Monday, 16 July 2012

Hear Me Out!

Only a few days after getting Hagane back from the spray shop, I finally managed to get my hands on one of the two legal mufflers for my generation of the Toyota Vios In Singapore. This exhaust was developed by Toyota Team Europe (TTE) and offers a mild yet enjoyable upgrade in exhaust sound.
 (On top: the TTE muffler, bottom: the stock muffler)


A couple of hours after getting it, I jacked Hagane up and got busy underneath. Changing the muffler is a relatively straightforward job, which consists in un-tightening the clamp linking the muffler to the pipe and sliding the exhaust out of the rubber support brackets. WD40 or any other lubricant is highly recommended there, and will make the job a breeze.

The TTE exhaust fits perfectly in the stock support brackets and after tightening the clamp back, I lowered Hagane and enjoyed the more baritone tune of the new exhaust - and loved it!


Sunday, 27 May 2012

Project Hagane - Back in White

After about two long weeks of waiting, I finally received a long awaited call from LTM Performance.

Hagane was ready.


Without waiting any further I quickly made my way there and when I saw her my heart skipped a beat - gone was the over-common grey car, Hagane was now wearing a gorgeous white gown. The fenders, widened and properly smoothed looked perfect and promised to be nicer on my tyres with little to no rubbing. The black highlights on the lower part of the rear bumper, roof, side mirrors and front grille brought a tad of differentiation and confidence to Hagane. 

I had the cold air intake revised and instead of having it stick out of the fog light cover, it was now integrated in the front bumper. The only mishap I found was that the funnel was sprayed white instead of black, but this would be rectified soon.

Inside, the three gauges on the A-pillar complemented the tone set by the tachometer with white numerals and red hands. I will now be able to keep an eye on the all-important temperatures, especially in sunny and hot Singapore.

As a final touch, I added a black sunshade covering the top of the windscreen, underlined by a red line, acting as driver recognition (mine is red, 'cause I like red!).

Following this, I right away went for a little night shoot, loving every aspect of my white Hagane.


Tuesday, 22 May 2012

Project Hagane - Workshop Time!

Time for an update!
It's been a while and a lot has happened since the cold air intake; I'll try to follow the timeline and give you every step of what happened since...
So yeah, the last update was about my DIY cold air intake. Fun. Could do better, though.

Let's do better then!
 
I started off by buying three NRG gauges to keep my engine in check in view of the abuse of gymkhana. The set consists of the basics: water temp, oil temp and oil pressure. This should give me enough info to keep my engine within normal operating temperatures and anticipate overheating.

Following this, I acquired a 4-2-1 exhaust header to improve on the low end power I will need for gymkhana.

While I would have loved to install all this myself, I opted to ask for LTM Performance's help to make sure the gauge sensors were installed properly, as well as the headers.

Dropping off my car at the workshop, I felt it was about time to address my hammered out fenders and the chipped paint on those. I gave the instructions and gave my keys, leaving my car in LTM Performance's hands for a long two weeks.


 A few days after dropping Hagane off, I swung by LTM Performance to check out on the progress. The gauges were being installed, with the sensors finding their place under the hood while the a-pillar cover was removed to install the gauge emplacements.


The fenders were still bare metal, but this time they were properly stretched and smoothed. As Hagane was jacked on one side so that the mechanic could access under the engine to install some of the sensors, I was given a preview of how much more travel the wheels could do under full compression, and I was now sure that rubbing was not going to be a problem anymore.
 
I then left the workshop not to come back before Hagane was finally ready... Stay tuned to see the gorgeous result!


Wednesday, 21 March 2012

Project Hagane – Breathe In Deep

I had noticed that Hagane was equipped with an open pod filter a little while back. The good part of having one of these is that it does not restrict the air flow as much, and gives out better high-end power. The downside is that an open pod does not create much suction at low revs, which decreases the low end power.

Since I am getting Hagane ready for autocross, I would rather have low-end power than high end, so I decided to revert to a normal (stock) air box. The detail that irked me was when I sent my car for maintenance and I saw in the bill that they changed my air filter.

I thus popped the hood and opened the air box to find a nice filter smiling at me. Hagane was indeed running a totally useless open pod and stock filter setup. Looks like the previous owner was either conned into getting a useless open pod, or he was running the car without the filter.

Wanting to remove the useless open pod, I dropped the front bumper and got to work. The funny part was to see that the open pod was connected to the air box by an unfastened tube, which could have been disconnected at any time, rendering the setup even more useless.


I took off the whole open pod and pipe assembly and replaced it with a simple flexible intake pipe that I fastened to the air box. Since I was working on it, I decided to make it a cold air intake. The principle of a cold air intake is quite straight forward – bring the air intake pipe to the front of the car where the air is cooler so that the engine is fed with denser air, leading to a better combustion and a slightly better response.
 While looking for a place to place the intake, I found a very simple solution – I removed the side fog light cover and stuck the pipe out of it. Simple, a bit grunge, but it does the job!


Check out Gordini's Pit Stop on Facebook 
for a few night shots I took of Hagane during 
a night drive somewhere in Singapore.

Saturday, 28 January 2012

Project Hagane – Shocking!

During the time I was saving for my suspensions, I decided to spend small dollars to change Hagane’s looks and differentiate her from all the gun metal grey Vios I saw on the road everyday (and trust me, there are tons of them!)

 I started by getting a new black sunshade (with a red stroke, for recognition) and a gloss-black roof sticker wrap to go with. I then complemented the looks by adding a few more highlights to Hagane.

Armed with some sand paper and a can of black paint, I sanded down and sprayed the side mirror covers and the front grille. Nothing like a little bit of elbow grease to get closer to your car, so I took my time, and patiently sanded down each part before applying four coats of black paint.

 
Once the parts sprayed and the paint dry, I purposefully omitted to add a final protective coat of varnish just in case if I want to touch up the paint, and proceeded to put the parts back in place. Instantly, my little grey Vios showed a little bit more character, which was complemented by the upgrade I have waited the longest to get – new suspensions.


It took me a long time to get there, and thanks to my boss and friend, Hong, I was finally able to get a set of STD Standard R3. STD Standard is a Taiwanese brand that produces a selection of street-to-race-ready shocks. The R3 model features damper and height adjustability with front pillow-ball top mount. The front shocks also feature adjustable camber for more dedicated use. Or for looks, as those who never bring their cars on tracks say.


 With that said, it was the first and only time where I was eager to get STDs. Pun intended.

While I unfortunately did not have the time, knowledge and tools to install the coilovers myself, I turned to LTM Performance for the installation. On the same day that I dropped my car off, I went to pick her up and my heart literally skipped a beat when I saw how low and aggressive she looked. Gone was the awful space between the wheels and the fenders, and with the spacers giving her that aggressive stance, Hagane turned from common to a real looker. At least to my eyes.

This is when trouble started. While this version of the STD Standard R3s were made for Toyota Vios, the addition of wide spacers (especially at the rear) was never taken into account by the brand, and even with rolled fenders, the rubbing between the wheels and the fenders was horrible. Horrible to the point where my rear tyres now sport and extra groove.

The next morning, I brought my tortured beloved car back to the workshop, and the good guys at LTM Performance had my rear coilovers sent back to Taiwan for some customisation. The shocks came back with greater height adjustability and everything was set back in place. To make sure the tyre torture would not happen anymore, I also asked for their help to knock the fenders out a bit more at the rear. The process chipped the paint on my rear fenders, and added some grunge to the overall rugged looks of Hagane.

Unfortunately that last part was not done up to my expectations, and the rear now sits still a bit too high to my taste and still rubs occasionally, while the front is just perfect. I will soon follow a friend’s recommendation and go to a shop that provides good fender knocking before finalising the rear suspension’s height to make Hagane at the same height at the front and rear, thus avoiding bringing unnecessary added weight on the front axle.

To finish her looks, I once again picked up the sand paper and spray can and underlined the rear bumper with an added touch of black.


I just love how Hagane looks now, and while the spray job is not perfect, the money it required to do it (under $15) makes it much worth it. Once I fix those rear fenders, I will finally be able to get the perfect height and the exterior/stance works should be done, excluding a nice new paint job.
On a funny note, while I totally love the way Hagane sticks to the asphalt, my dear girlfriend and a few other passengers tend to not enjoy the so called “bumpy” ride that Hagane gives. Too bad, right?


Wednesday, 28 December 2011

Advanced Driving Clinic

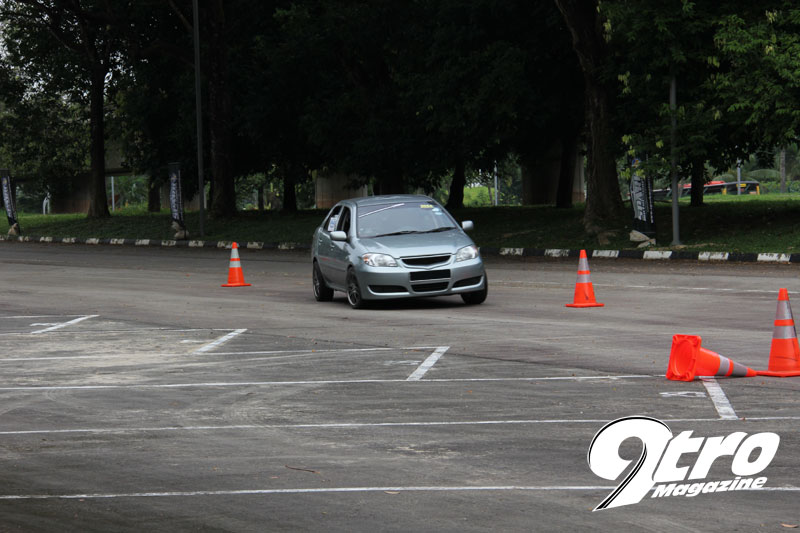
Back in November, Spark Motorsports organised an advanced driving clinic. Upon hearing about the event, three of us at 9tro Magazine signed up to take part. This would be my first advanced driving clinic and my first time doing “stunts” such as handbrake turns and J-turns, and I was quite eager to get down to it.

In view of the event I changed back to the 15 inchers I got with Hagane and their old and tired rubber so that I wouldn’t have any scruples about pulling the handbrake and risking to leave bald patches on the tyres.

The workshops started at with low level manoeuvres such as slalom, ABS-tripping emergency braking and obstacle-dodging swerves. Nothing too fancy, but good enough for a warming up session.


Just before we got to the fun games involving handbrake turns, the skies opened and literally drowned our playground. That did not stop us though, and the wet asphalt was actually a blessing as it would be kinder on the tyres.
The handbrake turn was quite brainless, but initiating a turn and pulling on the lever like a maniac to send the car spinning is endless fun, and I would have liked to play a bit more, but we had to stop as it was time for long awaited J-turn.

I have to admit, my first one was not very successful, and the car just turned without losing grip. A quick tip from the instructor to do a full lock to get the car to spin solved the problem, and I was quickly having fun reversing at high speed and flipping the car before driving off. This manoeuvre had me wishing for a bucket seat as the stock ones are definitely not hugging and I had a tough time reaching for the gearstick when splattered on the side window.

The day ended with a mini gymkhana competition that brought together most if not all of the manoeuvres of the day in a small course. To bring the spirit of competition forward, we would all be timed, with a reward for the winners. The two rounds mini competition was flagged off, and all the cars quickly gave their best to tackle the course.

At the end of the first round, I was the second fastest with 30 seconds, one second slower than a Subaru Impreza. To be honest, I was quite impressed to be so close to a car with a one litre bigger displacement engine and four wheel drive, especially since my front tyres could not get grip and were spinning most of the time (note to self: work on my throttle control). That was not enough, though and as you can guess, I was aiming for first place.

I put in more concentration to the second run, anticipating the moves and trying to get less wheel spin, and managed to clock 28 seconds, with no other driver matching my time.

I was delighted to win, but most of all proud of my Hagane who keeps on impressing me and the people around. The problem is that I have now officially been bitten by the motorsports bug and I can’t wait to do some more spirited autocross. Until then, I’ll have to find places to train! Stay tuned!

By the way, my prize is a free dyno run, so I will soon upload the power curves of my stock little machine, as a baseline before more goodies go under the hood.


Photos by Sam, courtesy of 9tro Group Pte Ltd.

Sunday, 25 December 2011

Project Hagane - Tacho & Spacers

It’s been a while since I updated Gordini's Pit Stop with Project Hagane, but I assure you, I have not been resting on it. Since October, the car has had a few more upgrades, and here they are now!

First off, as you may remember, I was complaining about not having any dials or gauges behind the wheel, which felt weird and was a bit annoying. Problem solved! I quickly acquired an Auto Gauge tachometer which I installed in that emptiness behind the wheel. This gauge came with a shift light, so that not only can I quickly see my RPM rate, but I also get warned when I reach the red line by the flashing red light, so that even if I concentrate on the road, I won’t over-rev the engine.
On top of that, I find it looks good, so I am wholly content.

Once I had something to look at behind the wheel, I turned my attention to the stance of Hagane. As I mentioned again and again, she was way too high, and my new rims looked lost in those wheel wells. I knew I wanted to lower her, but something else caught my eye – all the lowered Toyota Vios I see on the road have a ridiculous look with the wheels tucked deep inside the wheel arches, and I did not want my Hagane to look as such. My solution would be to get spacers.


Thanks to a friend’s recommendation, I headed down to a small shop lost somewhere in Toa Payoh to talk to the old man in charge. By the looks of it, he has been doing spacers and other CNC-built metal pieces before I was even born, and he clearly knew his trade. He made some quick measurements and set off to work. 

Four days later, I headed back to the shop to get my new spacers.

Their size is ridiculously thick, with 20mm for the front and 30mm for the rear, but that just shows how my car needed them to get a respectful stance. I rushed back to my office/garage and installed them right away.


Although still sitting high, my Hagane now looks a little bit meaner with a 40mm wider stance in the front and 60mm wider in the rear. Things are starting to look good!